

Origami - 折り紙 is the Japanese popular art of paper folding. This art implies transforming a simple sheet of paper into any object you can think of. It can be an animal, a decorating object, a flower, an envelope, or even a toy. Besides, they can be two-dimensional and three-dimensional subjects. You only need a piece of paper and some folding instructions!
Skip to paragraph 4 to learn how to make an Origami crane.
What does "Origami" mean?
The word Origami uses the kanji of oru, 折る - to fold, and the one for paper, kami - 紙. In Japanese schools, children learn how to make basic Origami, as a way to express art and entertainment at the same time. It's a recreational art that became part of Japanese culture to foster creativity among youngsters.
Although the word is Japanese, this tradition has existed since ancient times also in China, Arabia, and western countries.
Origins...
Japanese handcrafted paper began to be made around the 7th century, following China’s example. At that time, in Western countries scrolls and sheets of papyrus were used instead. As Japanese people improved their ability in making handcraft paper, their uses spread around the country.
Japanese origami was formerly practiced since the Edo period (from 1603 to 1867). However, there is proof that this practice existed before the year one thousand, for religious functions. Only priests and members of the imperial court had access to it. There is a reference to a paper model in a poem of 1680, which mentions a traditional butterfly design used during Shinto weddings.
... and How is Used Today
During the last century, this art became very popular in Europe and in America, so there was a big boost in creating new and original models for paper.
The art of folding is still used today in greeting cards for example, or packaging. This gave birth to another practice, called tsutsumi, 包み, literally “package”. Packing gifts with colorful envelopes following simple folds is very popular in Japan. Wrapping and hiding is the best way to offer gifts in Japan.
How to create an Origami
You can create origami with almost any flat material: the only need is to hold a crease.
In Japan, origami paper is handcrafted, and sold in various sizes, from 2.5cm to 25cm. Paper has different patterns too, generally colored on one side and white on the other. The name for this specific kind of paper only for Origami is washi - 和紙. This word uses the before-mentioned kanji for paper, 紙 - kami, and the one for harmony and peace. Furthermore, remember that the kanji wa - 和 does appear in lots of words with the meaning of “Japanese”. Examples are waka - 和歌, a traditional Japanese poem, or wagashi - 和菓子, the Japanese-style confectionery.
A small number of basic folds, called "square base", "fish base" and similar, will conduct to the final form. Following the folding instructions accurately is the only rule: valley and mountain folds, pleats, reverse, and squash folds. As a result, you can create anything, from small containers to decorating objects.
How to Make an Origami Crane
The best-known origami is surely the crane: a legend says that if you fold 1000 origami cranes, your wish would come true. The crane also became a symbol of hope during challenging times.
Folding steps
You can build your Origami Crane with a basic square piece of paper. I used the 15x15 cm origami paper one.
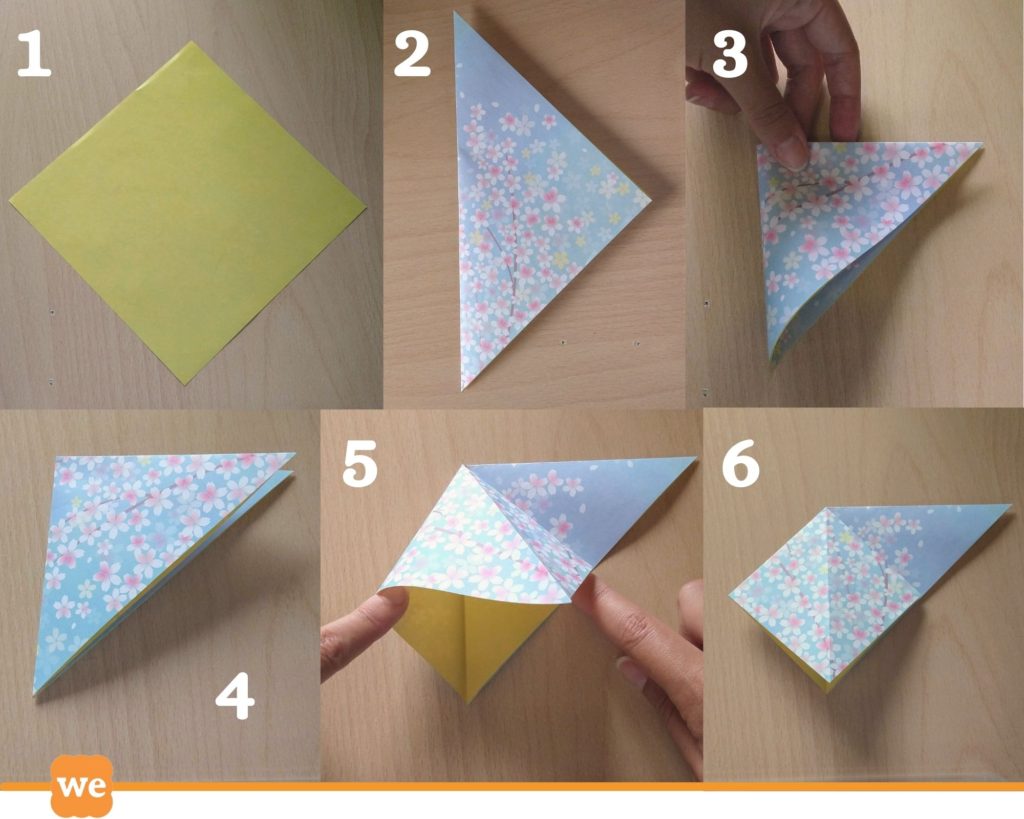
Fold your paper diagonally, from corner to corner, obtaining step 2. Then do it again like in picture number 4. These are the "valley folds". Gently open the paper like in figure 5 to get step 6.
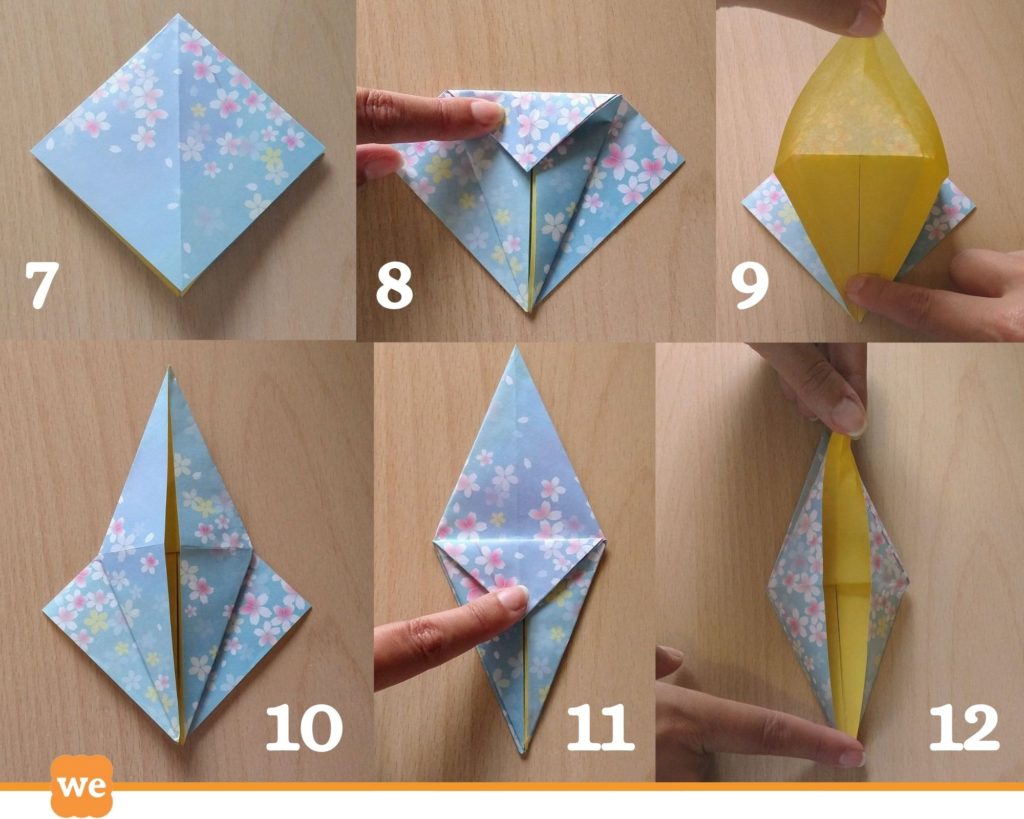
Do the same thing on the other side to obtain a "square base", like in step 7. Now, fold the top, right and left corners to the center, like in step 8, and pull them back. These folds are necessary to prepare the paper for the next step. With two hands, lift up the top front corner and hold down the other three front corners. Pull the top corner up (step 9). You should obtain step 10.
Repeat the procedure on the other side (steps 11 and 12).
The Bird Base
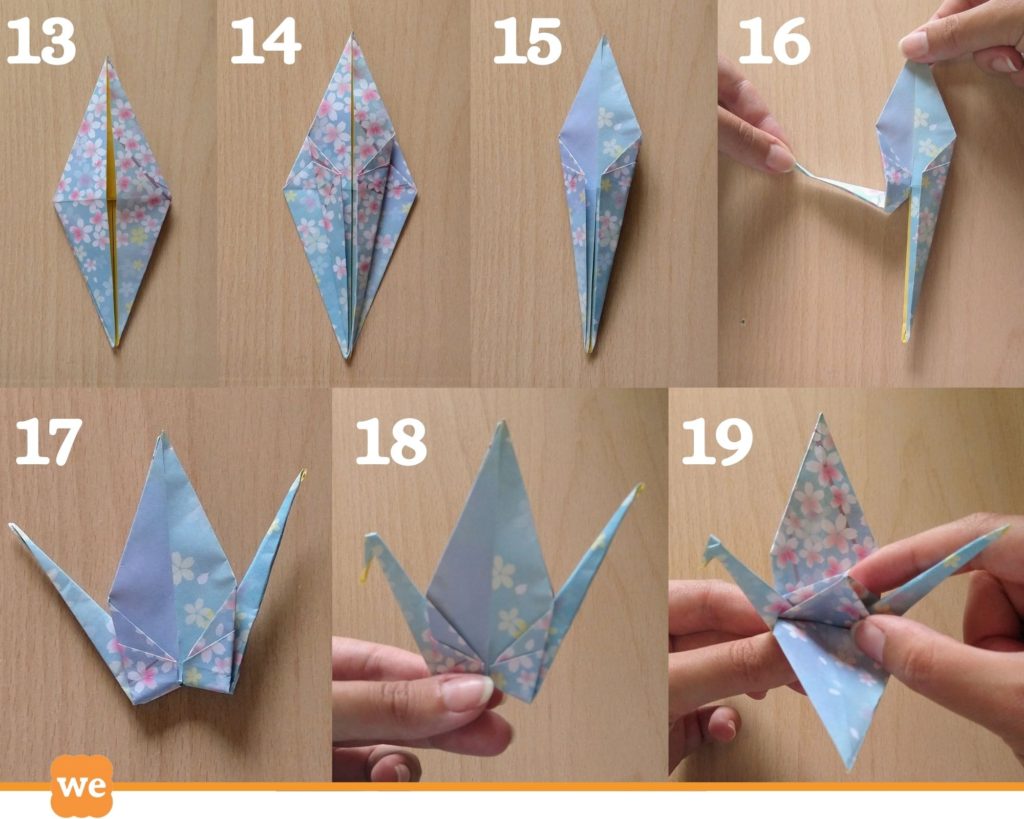
Once you obtained the "bird base" (figure 13), fold the right and left corner o the center (step 14). Repeat on the other side (step 15). Now, pull up the two long pieces of paper on both sides (figure 16) to obtain figure 17. These are the neck and the tail of your paper crane. Bend the top of one side down to make the head (step 18). And now unfold the wings (figure 19). Finally, press the folds, and gently pull the wings apart to make the paper crane able to stand.
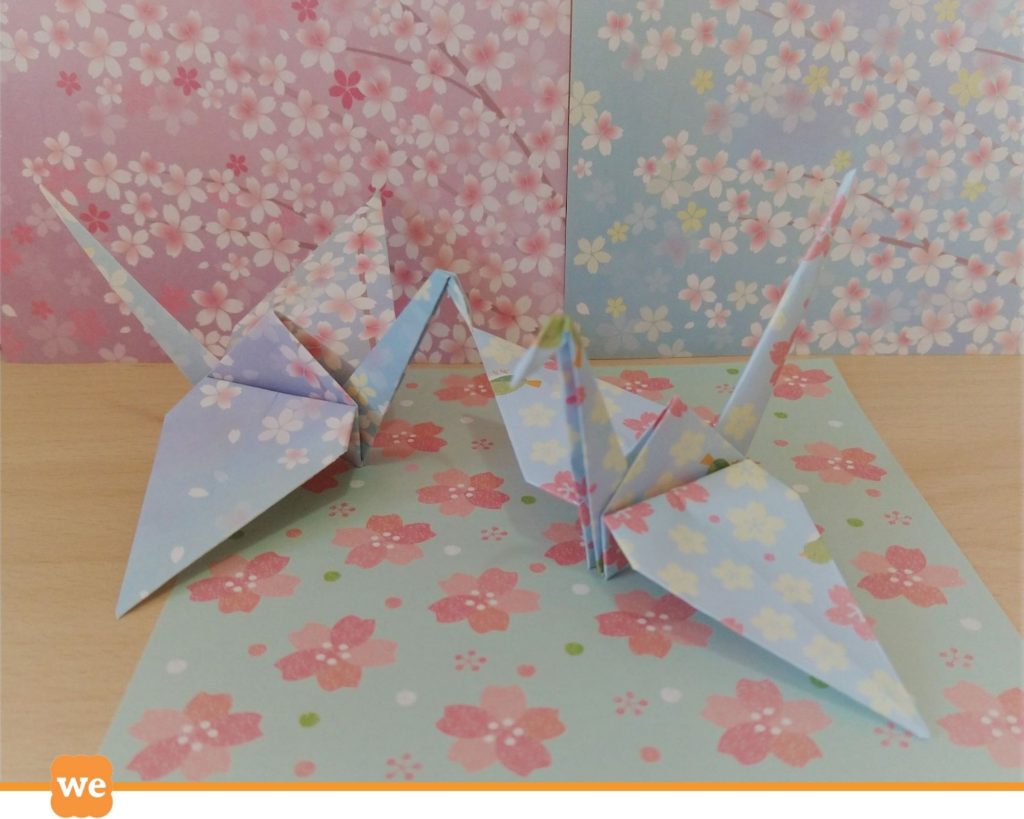
Here's your paper crane!
Author: Valeria (graduated from Ca’Foscari University Japanese Studies)